

Negative Reaction
One would think that the gremlins would be quite pleased with themselves for frustrating Elmo’s repair efforts. However, even the gremlins fear Worse.
The 3D efforts continue to go well. I am working on version number 34 of the Lucas character model, there have been a few more additions to the garage (which are not visible in today’s cartoon), the Snafu 3D model has been started, and the Kitchen scene is now about half finished. More on those items in future posts.
Since I have been asked a number of times how does this 3D stuff work with your hand drawn work, here is a quick run down. The 3D models have been covered in previous posts, so I won’t go into that. This will just cover the CGI generated backgrounds or in this case the Garage Scene (currently on version 27!).
Obviously, the first thing to do is start up Blender and load the Garages scene file. Which looks like this:
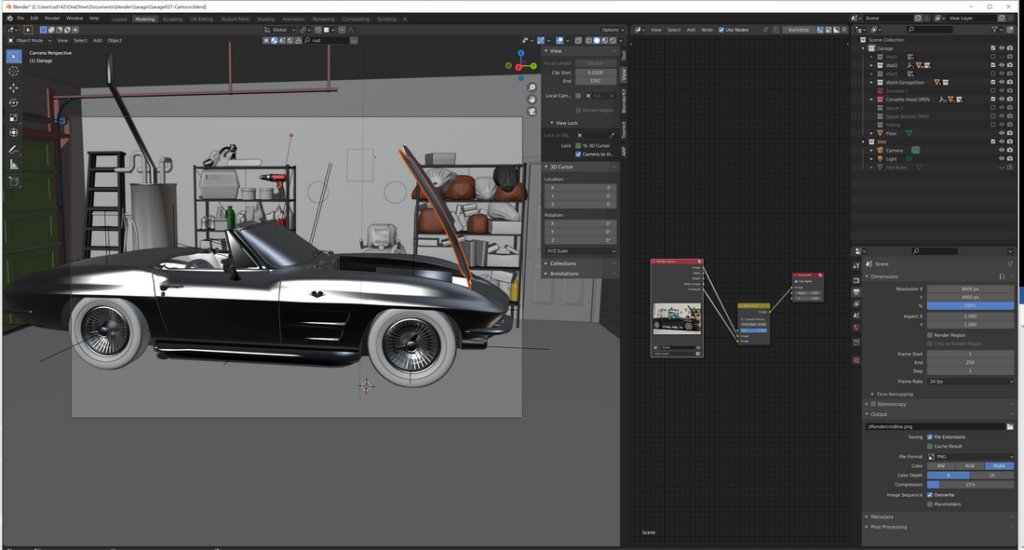
You’ll notice that there are 3 panels displayed: the first is the actual Garage scene with the camera view, the second in a post processing Compositor view, and the third is the lists of items contained in the scene.
Not surprisingly, most of the work is done in the first panel. The scene is set up just like you were using a camera. The camera (lighter rectangular portion of the screen) is positioned to capture the desired vantage point and the picture is taken (rendered in 3D speak). Simple, right?
Except when the other objects obscure the scene that you want. For example, this is what the scene would look like without using the items listed in the last panel . 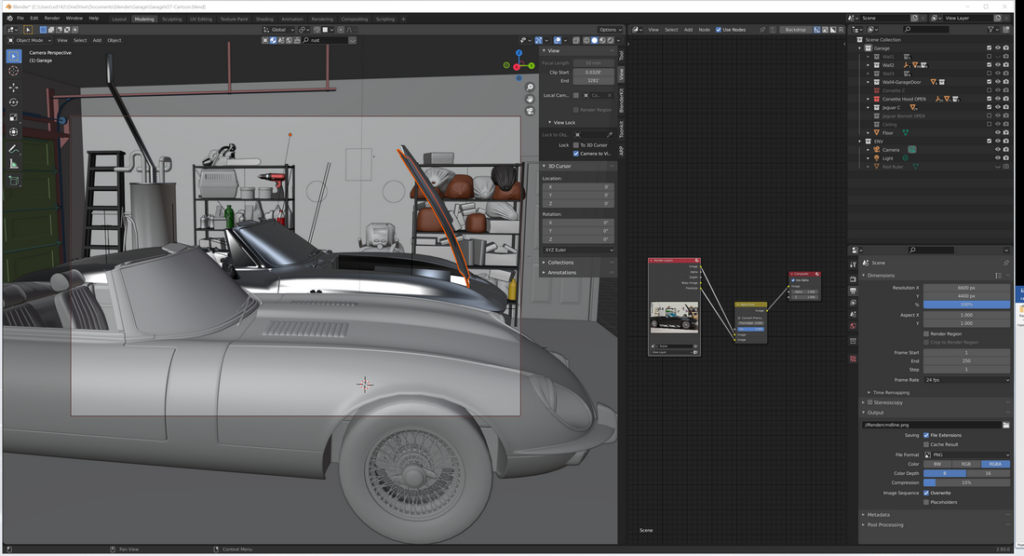 The other car ruins the shot of the Corvette. It almost completely obscures the view of the Corvette. That is why the items list is so handy. You just use the little checkbox next to the item to pick what you want to show up in the scene. This allows one to hide walls, ceilings, and other items to get just the shot that is desired.
Once the picture is framed, the equivalent of pushing the camera’s shutter button is done and the image is rendered. About half way through the process, the image looks like this: 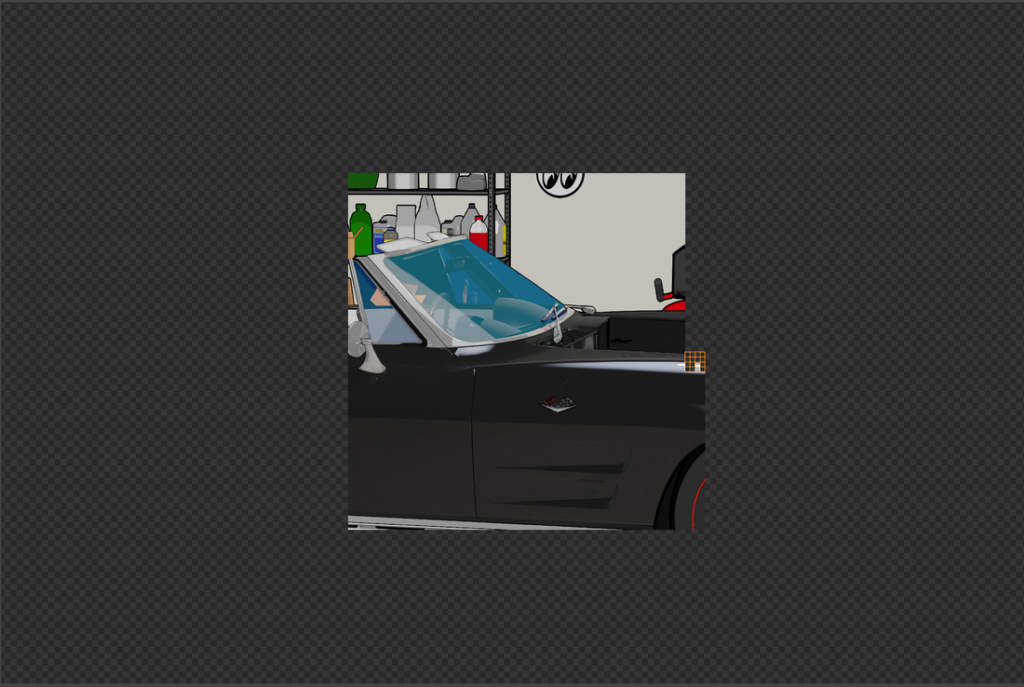 The little orange boxes are where Blender is rendering the image. It takes the computer about 15 minutes to complete the image generation process. Which is not too bad considering that at one point this process was taking almost an hour and a half. But that was about 10 versions ago. An interesting feature of Blender is that it works a little backwards. In other words, it does most of the line drawing after the color image is generated (note the lack of “ink” lines on the car itself). This is a very handy feature as it can be directed to a separate image.
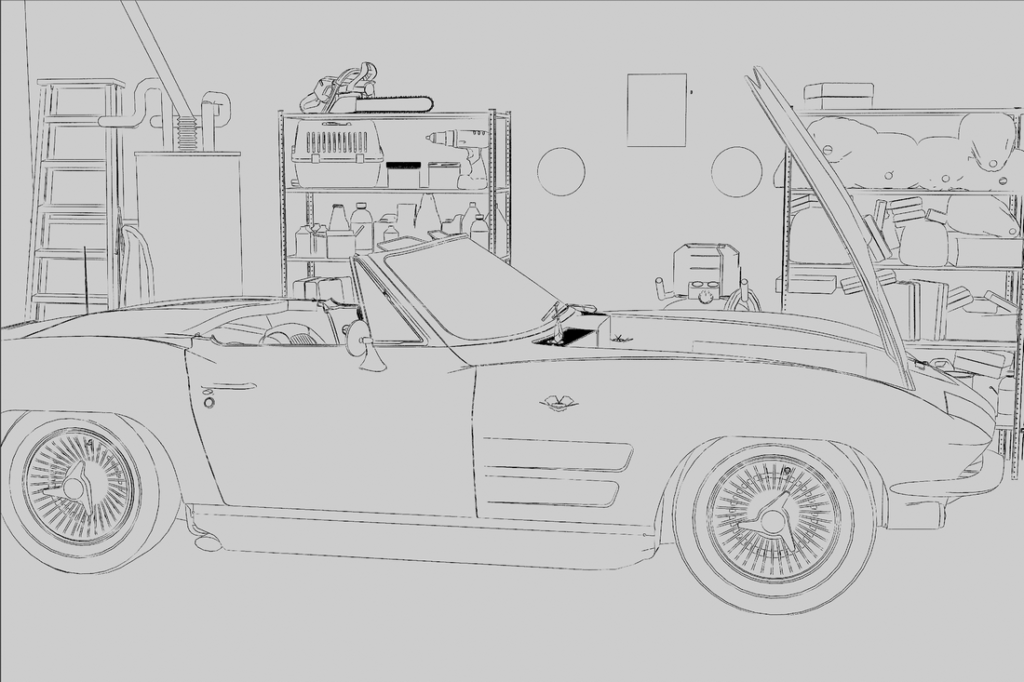
Here is the finished image. Or I should more correctly say: imageS (plural). There are actually two images generated: the color image and the “ink” or line image. Very much like the way that I draw thing in the old-fashioned manner. Taken apart they look like this: 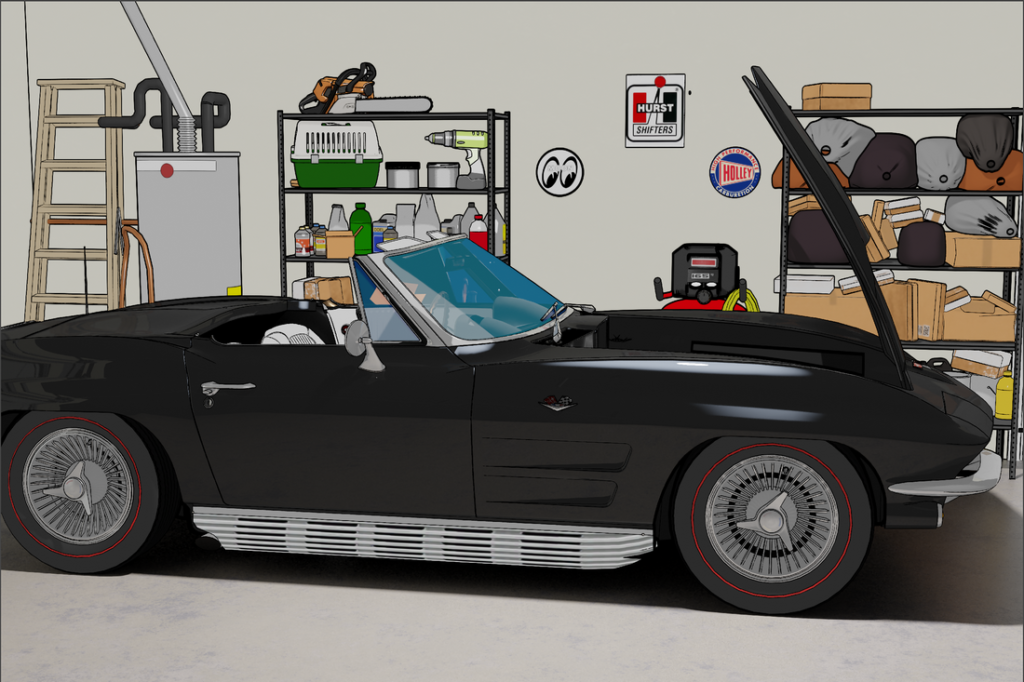
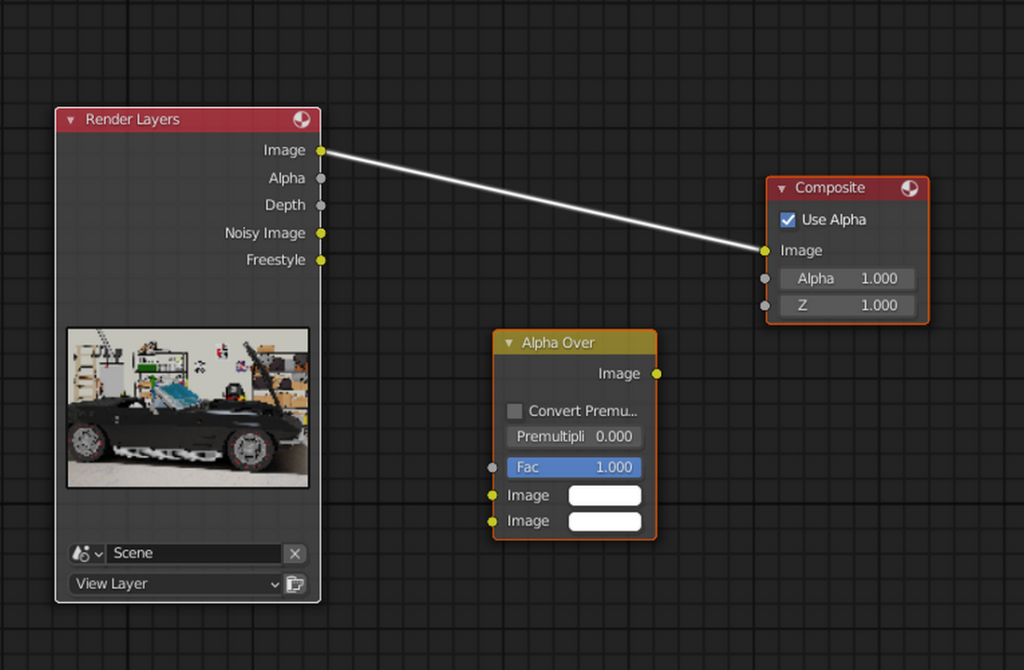
 The separation of the color and the line images is handled in the second post-processing compositor panel. All that is need to separate the images is to connect the boxes like this for the color image.
,,,and like this for the line drawing: 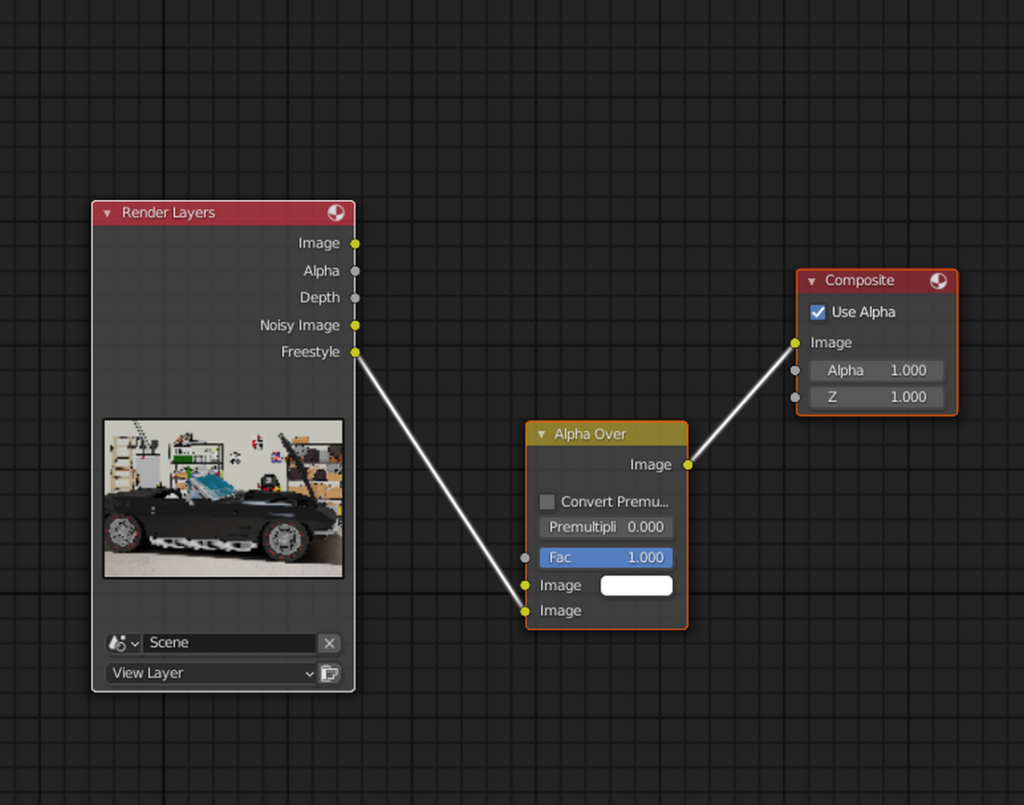
One might wonder why bother with splitting the images? That is because sometimes the computer-generated image still needs a little tweaking. The generated images can be imported and edited in many art programs. I use Clip Studio Paint and Photoshop and this arrangement works perfectly in both. Usually, the cars need to have the ink lines thickened a bit. The color images usually have to be lightened up, too. Also, I can’t seem to get the 3D model’s windshield coloring right, so most of them have a windshield layer added. While all of that sounds kind of complicated, it isn’t. It usually only takes about 20 minutes to generate a background. Most of that time is the computer crunching out the image so it REALLY only takes about 5 minutes of my time.
While the computer is busy, I sketch and draw the gremlins, Elmo, and Sprocket with respect to the backgrounds generated. This works most of the time but I end up drawing more than I need and throwing away what I don’t use. Here is an example of some of the stuff that gets clipped or tossed from today’s cartoon. This is what was going on behind Elmo in panel 1. 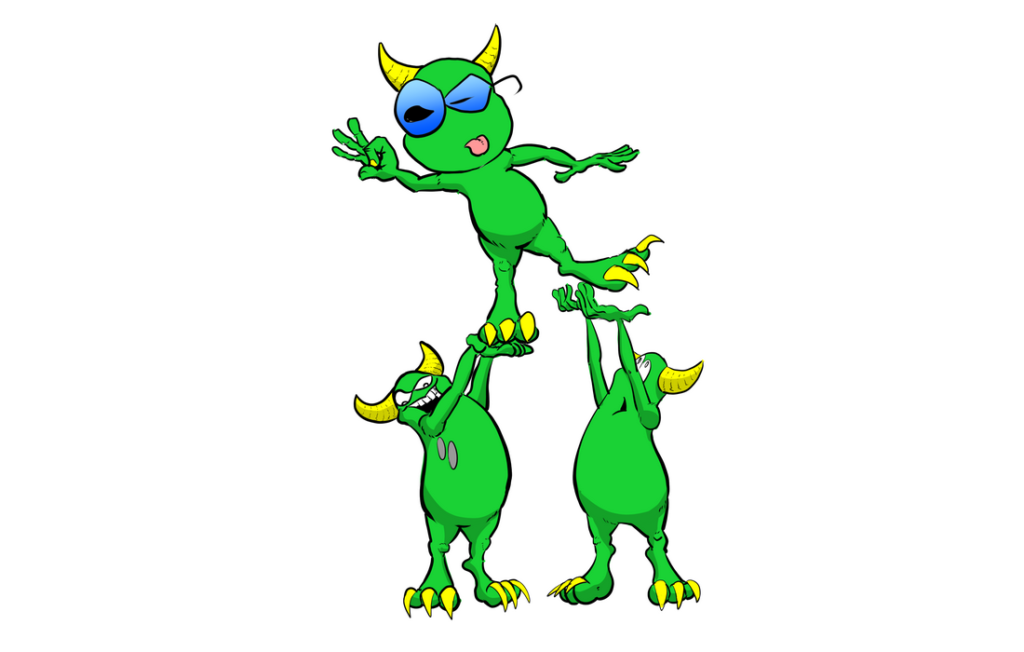 When it comes down to it, I would much rather spend the time drawing these guys.
6 thoughts on “Pesky Gremlins Comic 722 – Negative Reaction”
Binky
It’s interesting to see how it all works together. Blender works quite a bit differently from AM in the rendering process. Glass can be tricky to get right. I assume you’ve tried adjusting the color, reflectivity, and transparency of the glass. Also the refractive index. Sometimes it pays to just do tests on that part of the image alone in a small image closeup to do some quick renders while adjusting the variables.
H Stacy
Blender does a great job of rendering photorealistic glass. I am having trouble getting the cartoonish glass to render. I have made a rather elaborate cartoon glass material that is OK (see the windshield above) and it has all of those parameters. I just can’t seem to get the light blue fading to dark blue to render the way I want.
However, redrawing it the old way is only about 10 clicks of the mouse.
David Hurley
It cool to see the image of the Gremlins revealed from the first panel (I hate when I have to hide something to make a scene work). Looks great!
H Stacy
Thanks David! Character and background images frequently get edited out due to my piece-meal way of assembling a strip. I have LOTS of these images that never get used.
In the future, I will try an show more of these.
Jerry Keslensky
Looks like the fan is about to blow stuff in the opposite direction. Rule #1 of chewing tobacco and spitting out the window of a moving car is to first check the wind direction. Blow back is messy.
H Stacy
While the gremlins recognize the problem, Elmo has no idea what he has done.